
You have no items in your shopping cart.
Loading...

Installation is best carried out by a qualified person.

1. Check the wall of the vehicle and verify the position of the reinforced points - you can also request this information from the manufacturer or ask your dealer.
2. After confirming the correct reinforced points, choose the appropriate brackets for your RV and awning.
3. Mark the fastening points on the outside wall of your RV (Fig A). Keep in mind, in order to receive the pulling force of the retractable arms, the brackets need to be fixed exactly behind the stickers 'SUPPORT' which are on the awning. It is necessary that the brackets are fixed equal distance from one another (d). Ensure that the awning is installed horizontally.
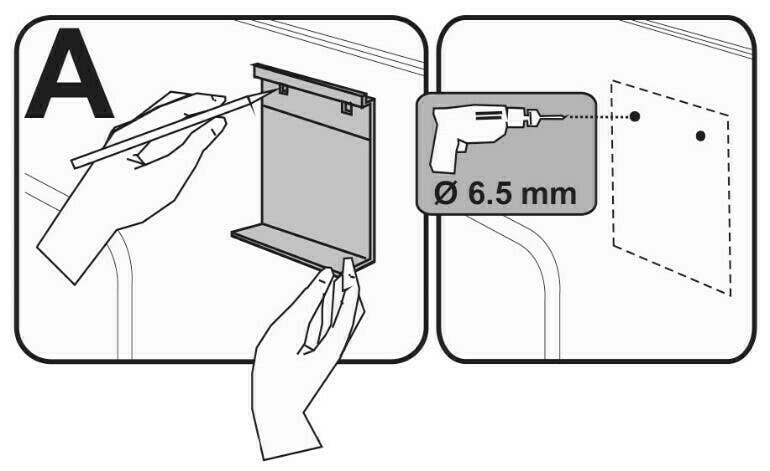
4. Before drilling, make sure that there are no obstacles on the inside (e.g. electric cables, gas pipes, etc).
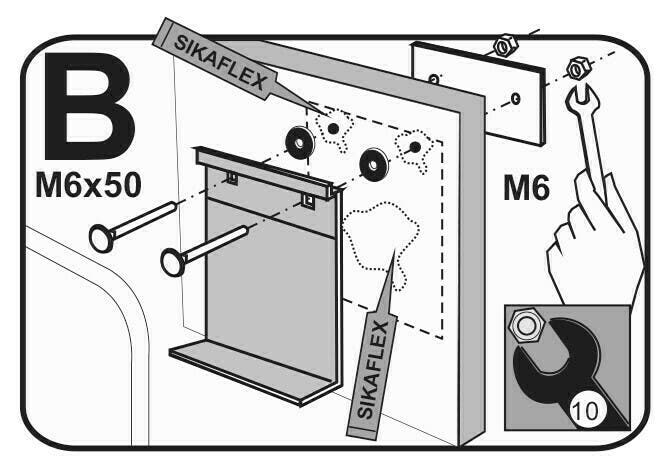
5. Fasten the brackets, but be careful not to overtighten the lock nuts of the bracket plates (Fig B).
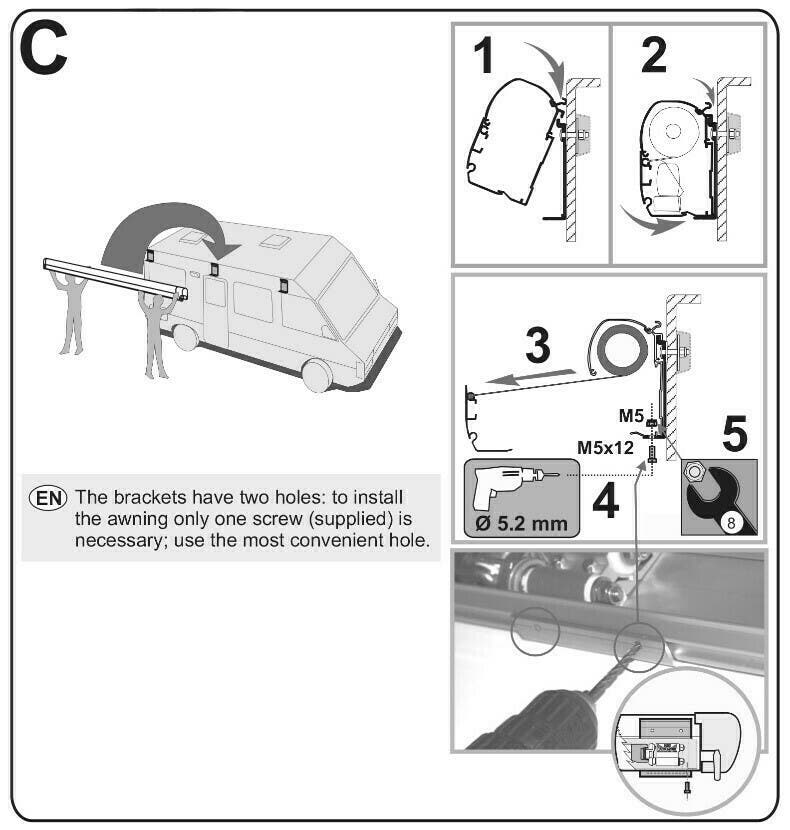
6. Place the awning on the brackets and fasten it as per illustration (Fig C).
You need to choose options for your item for estimaste shipping
