
You have no items in your shopping cart.
Loading...

Coast’s range of Stone Shields keep stones, pebbles, and other road debris from kicking up and chipping your RV’s paintwork or denting the frame. They are simple and easy to set up with no drilling required! Check you have all the components and tools needed nearby before beginning to make it even faster.
Tools you may need: 5mm Allen Key, Adjustable Shifter, Hex Head Screwdriver, Philips Head Screwdriver.
Step 1: Locate the Centre Piece and move it to a workable area free of obstacles and safety hazards.
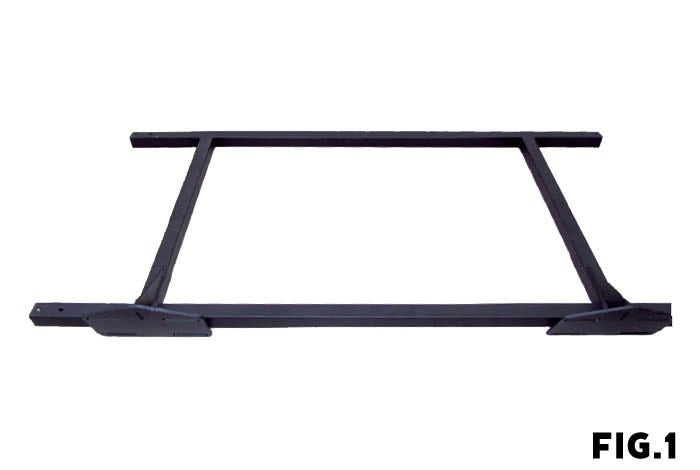
Step 2: Locate one of the End Pieces and slide into the Centre Piece. Repeat the process on both sides and secure with the 20mm self-drilling screws.
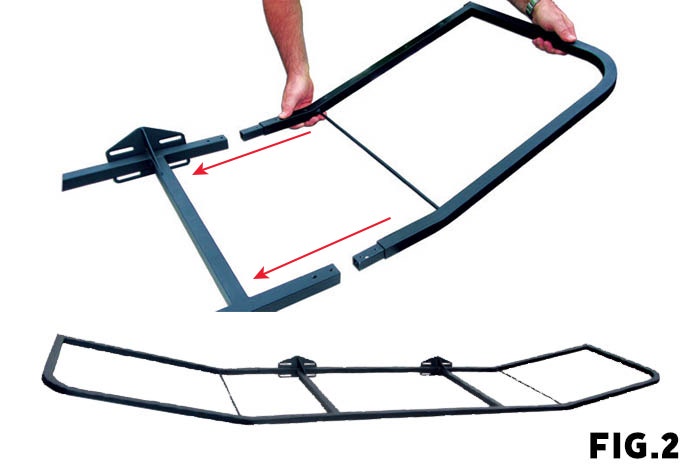
Step 3: Use the screws to secure the reinforcing plate to the Stone Shield frame. Repeat the process on both sides.
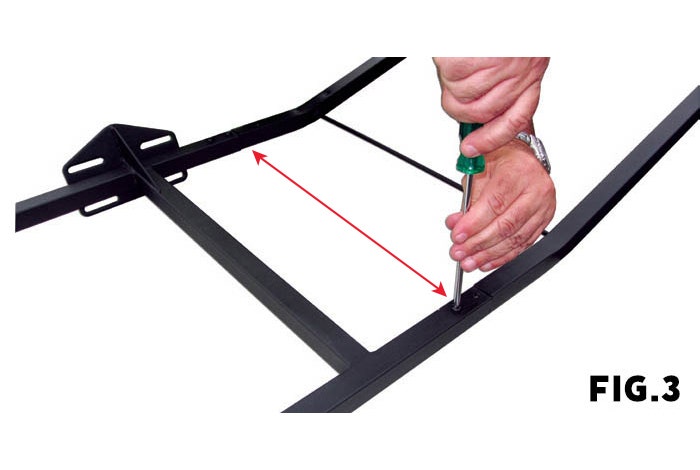
Step 4: Locate the mesh. The Stone Shield frame is pre-drilled, showing where the screws need to go.
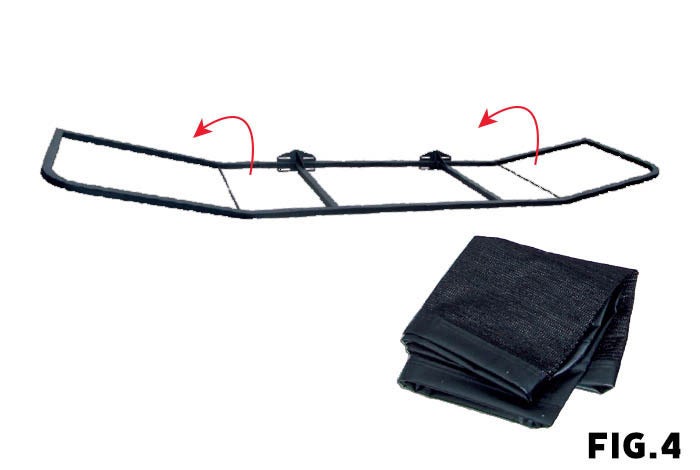
Step 5: Line the mesh up with the Stone Shield frame. Using the 20mm Threaded Screws, secure the mesh to the frame. We recommend starting with the corners and then continuing to work around the entire frame.
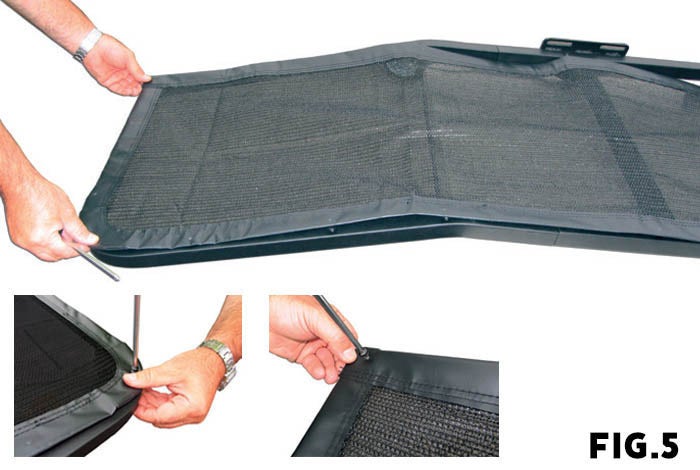
Step 6: Once the mesh has been secured to the frame, it’s time to attach the mud flaps. Locate the mud flap bars, mud flaps and the 25mm threaded screws.
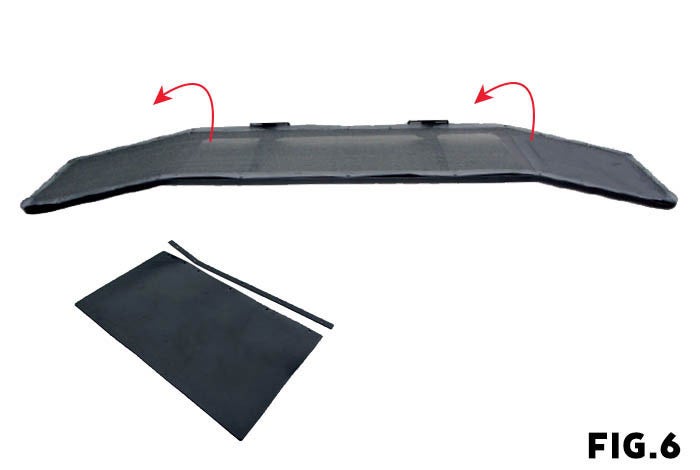
Step 7: Take the mud flap and line the holes on it with the holes in the Stone Shield frame. Place the mud flap bar on top of the mud flap, ensuring the holes are all aligned, and screw in to secure to the Stone Shield frame.
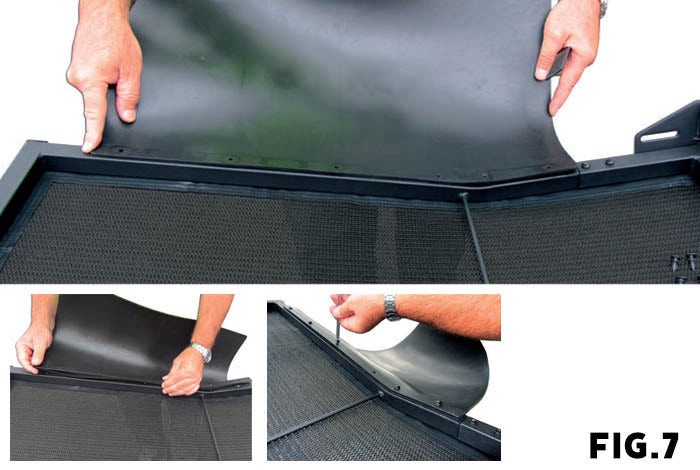
Step 8: Once both mud flaps are secured, take the Stone Shield frame over to the A-frame of your RV. To determine the best position for your Stone Shield, sit it on top of the A-frame but make sure that you have clear access to at least three of the cutouts.
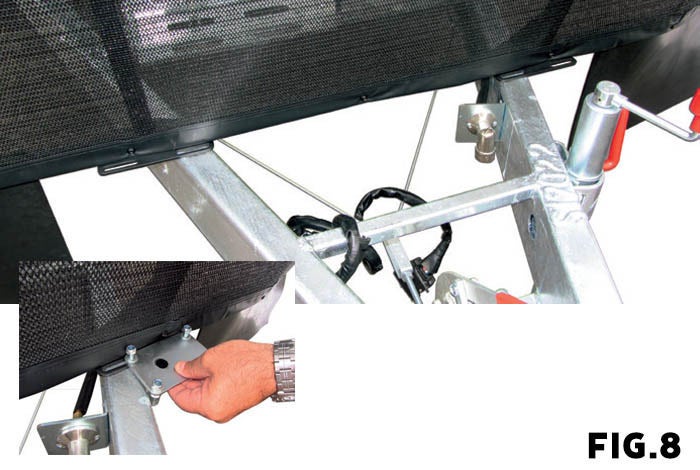
Step 9: Once the best position is determined, locate the U-brackets and fit onto your A-frame. (Rubber spacers and varied bottoms are provided for thicker A-frames). Attach the mounting feet to the Stone Shield frame.
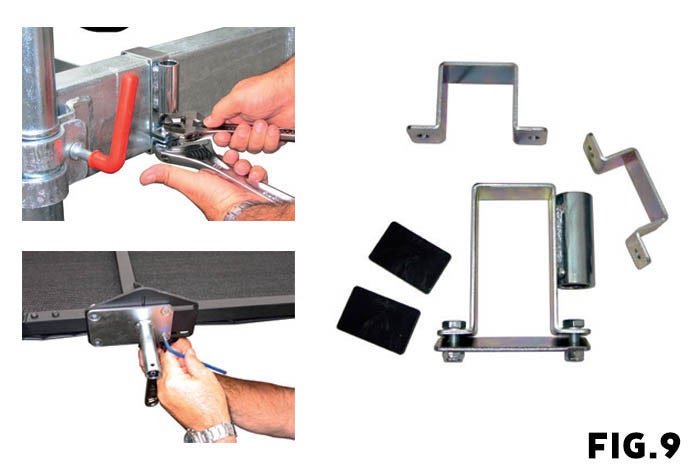
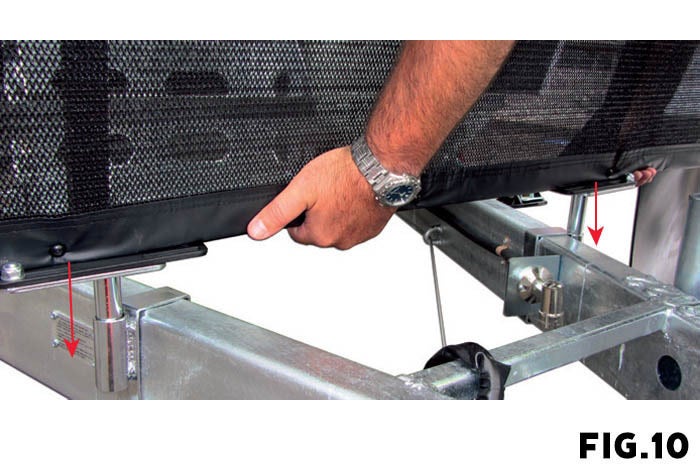
Step 10: With the mounting feet bolted onto the frame, lift the Stone Shield frame onto the A-frame so that the downward prongs fit into the receptors on the U-brackets.
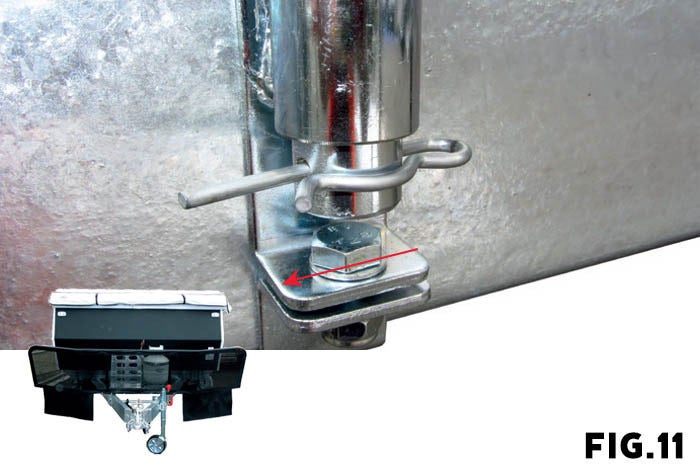
Step 11: Finally, use the locking pins to lock the Stone Shield frame to the receptors to stop the Stone Shield frame from lifting.
You need to choose options for your item for estimaste shipping


